Art Journal 101 - create a completed page
- Caitlin
- Oct 21, 2019
- 2 min read


Well you did it! You have gone through all the basics of starting an art journal and are now ready to use those skills to create a completed page.
This may sound daunting, but I promise you that it is not! I usually grab inspiration from Pinterest, or something that is going on in my personal life that I need to work through. A lot of the time I have all these thoughts going on in my brain, and it won’t shut off until I get them down on paper. The perfect place to write these thoughts down is in your art journal.
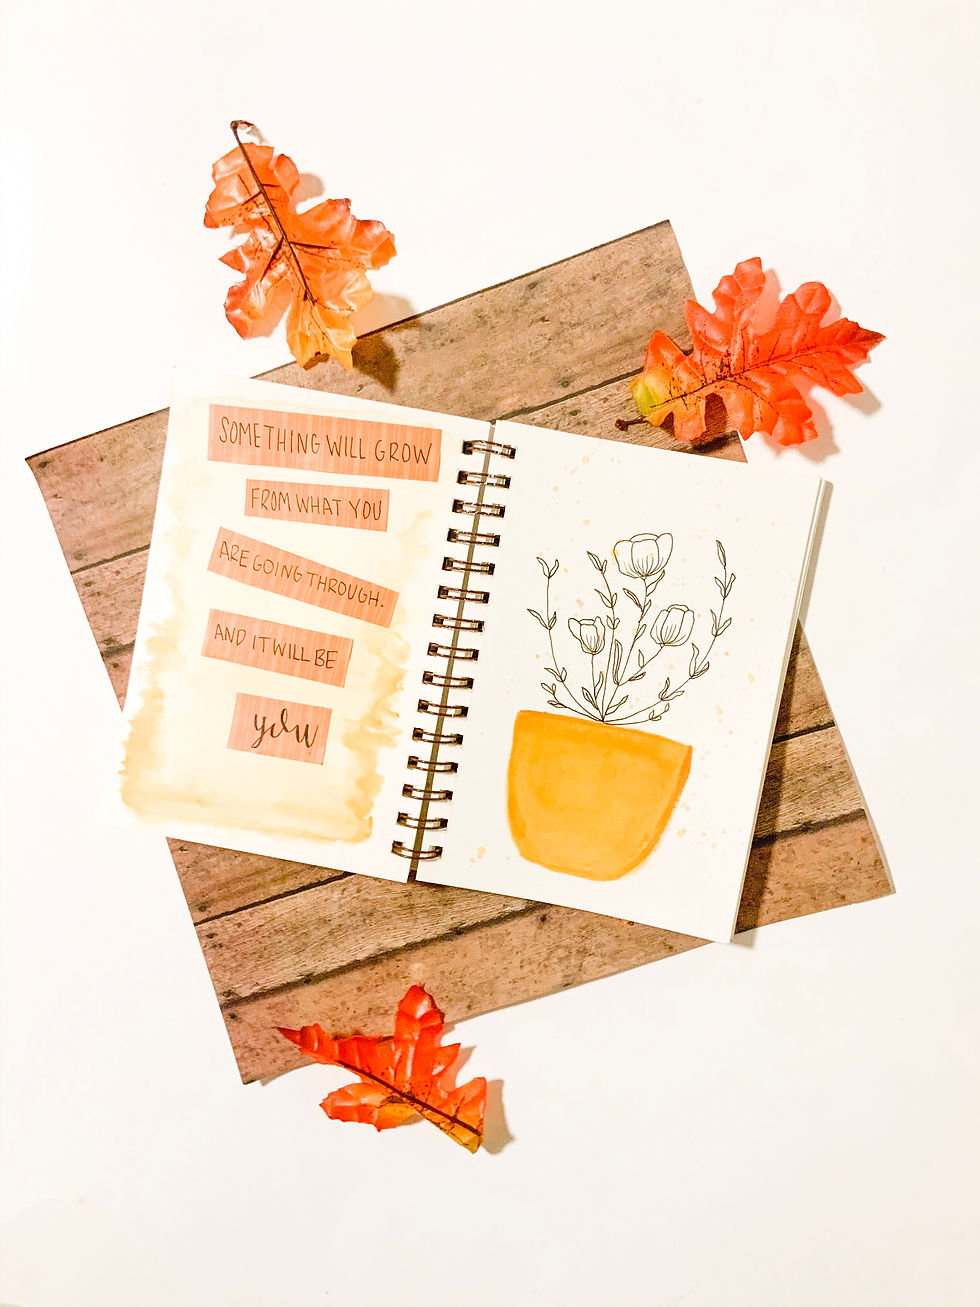
In the example I am going to show you today, I was channeling the inner changes that we go through during our lives. I figured I would stick with something basic, so I decided to go with a floral route, with a positive quote.
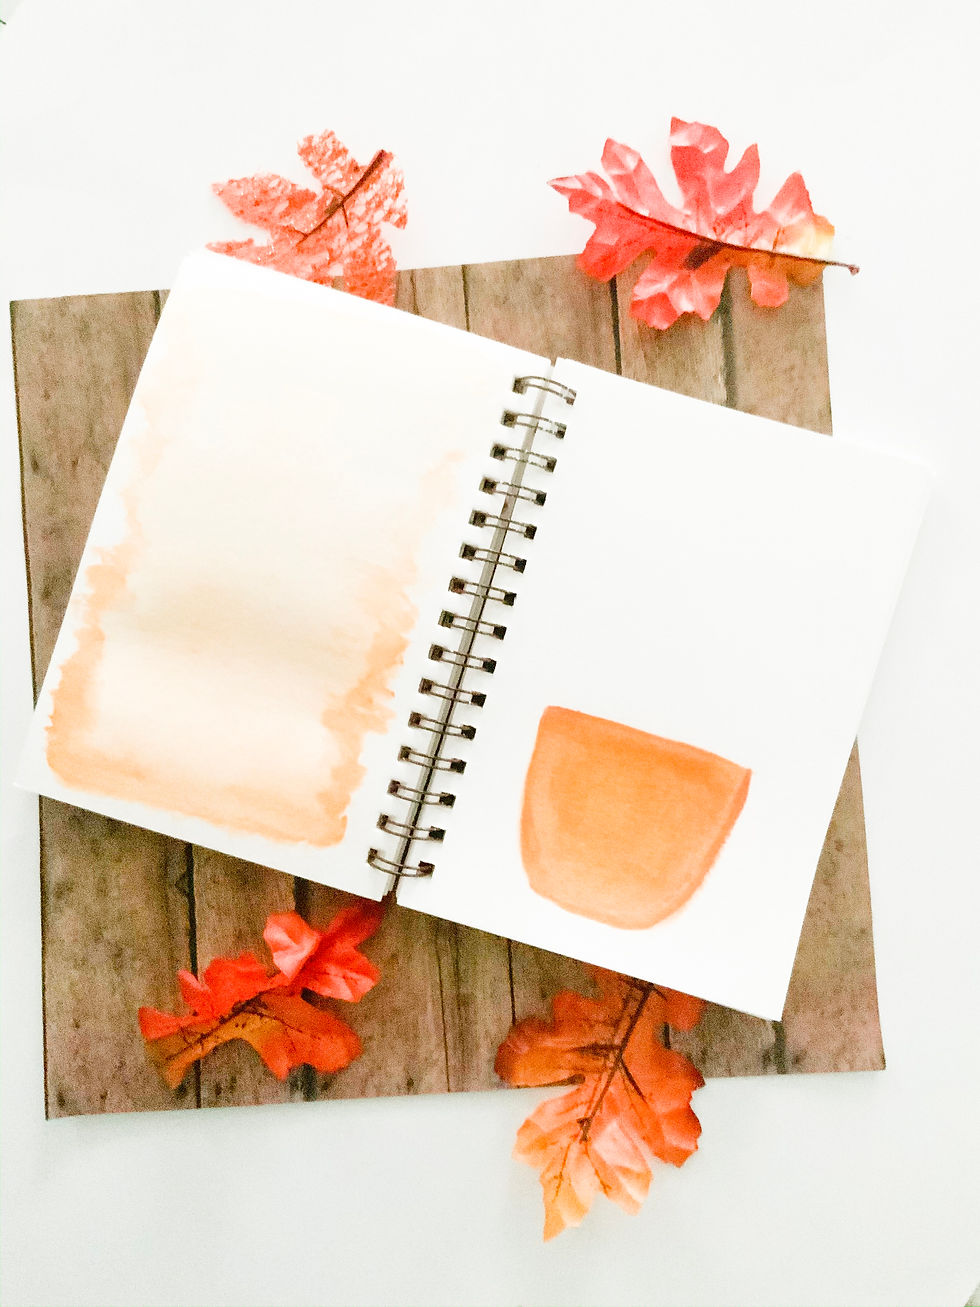
I started out with the background. I did a basic ombre watercolor background on the one side, and used the darkest color to create a pot for my flowers on the opposite side.
I then used scrapbook paper to write out my quote. I wrote out the quote on a normal piece of paper first, and measure out the length of the strips I would use. Using mod podge, I adhered the paper to the background. I used a marker to write out the quote.

The side where my flowers are on was a little easier to create. After I had the planter finished, I used a pencil to outline the flowers. When I was happy with the flowers, I used a Micron Pen in size 05 to go over the pencil. I really loved how the flowers turned out.
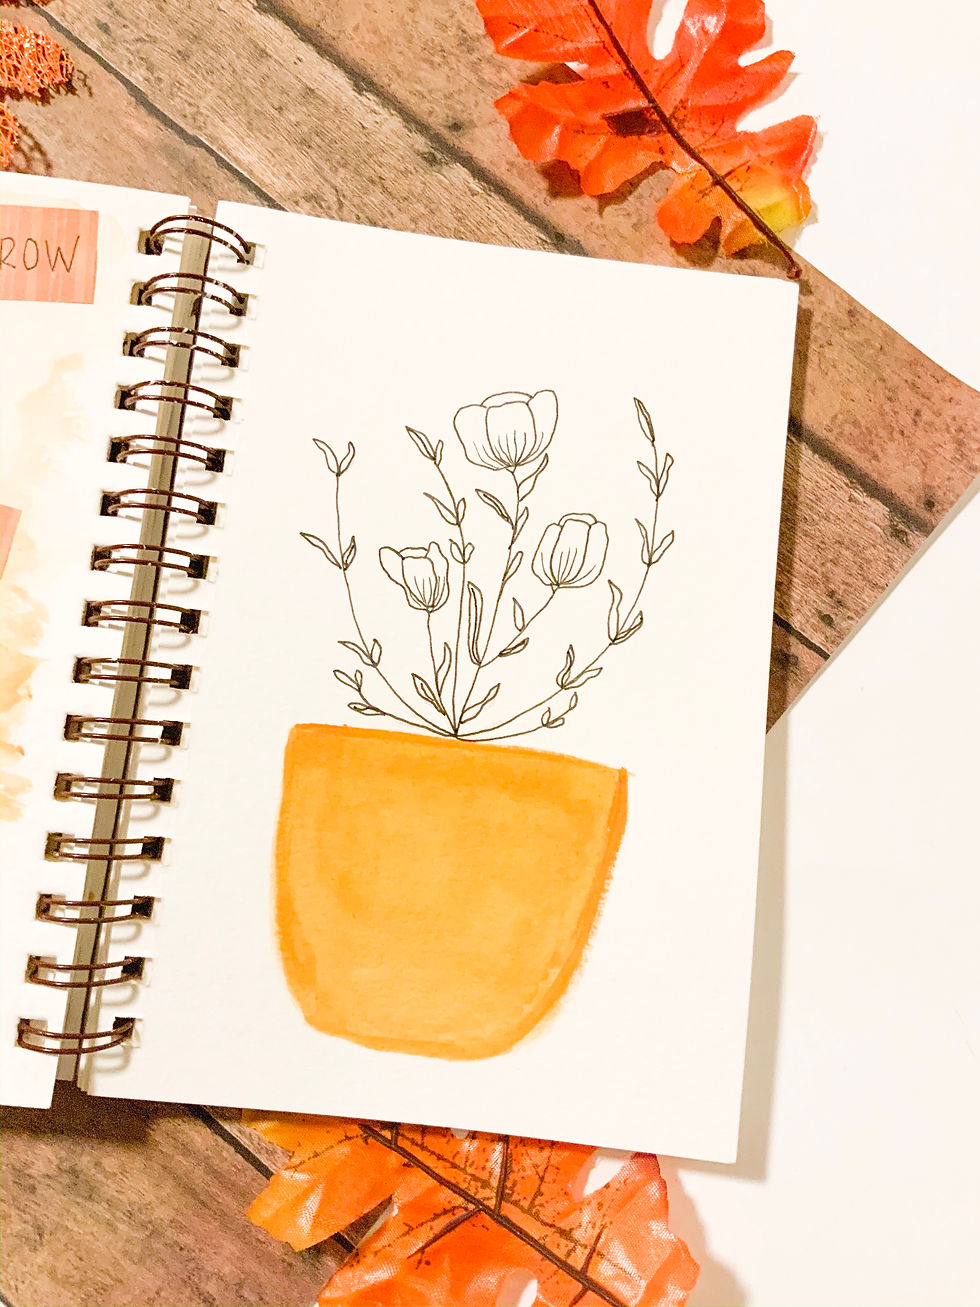
For a final touch, I splashed some watercolor over the flowers, to give it a little depth. I love using watercolor in my art journal, it is by far my favorite medium to use.
So there you have it, an art journal page from start to finish. I hope you enjoyed my mini series on art journaling, and that it gave you a creative outlet. Don’t forget to keep an eye out for me on Instagram and tag me in any posts that use these tips!


Comments